Showing posts with label Supper Dishes. Show all posts

Sunday, December 22, 2013

Meatloaf

Oh, hello there... Long time no cook, eh?

I will admit - life got a little busy. But with the holiday season, my thoughts were constantly turning to grandma. There was a reason I started this blog, and that's the same reason I'm here today; to remember Mrs. Mary Murphy.

I made this recipe awhile back, but didn't blog it at the time. And I'm sorry for that - as it is absolutely delicious! Seriously, the best (and easiest!) meatloaf recipe I have ever tried.


The Recipe Card


The Process

Soak rolled oats in tomato juice for 10 minutes. Yes, I use my iPhone as a timer. Wonder what grandma would think of that ;)


While the oats are soaking (this is a really important step by the way! The oats soak up all the juice and I can only assume this is why the meatloaf is so juicy and delicious), I shooed my children out of the kitchen so they wouldn't see me crying over the onions.


In a separate bowl, I combined the egg, mustard, salt and pepper


And then added it to the ground beef


Yum! ... ;) Add in the rolled oats and you're off!


I packed mine into mini loaf pans instead of one large loaf pan so I could have a variety of toppings.


Yes, that's right, variety IS the spice of life!


Pop 'em in the oven, and an hour later, you have a delicious dinner!


The Recipe

Ingredients
1 cup Rolled Oats
1-1/4 cups Tomato Juice
1 Egg
1-1/2 pound Ground Beef
1/4 cup Onion (minced)
1-1/2 tsp Salt
1 tsp Mustard
1/4 tsp Pepper

Directions
1. Soak rolled oats in tomato juice for 10 minutes.
2. Add slightly beaten eggs, ground beed, onion and seasonings to combine thoroughly.
3. Pack in greased loaf pan 4-1/2" x 10".
4. Bake in moderate oven 350 degrees for 1 hour

Serve hot or cold. Yields 12 servings.


My Personal Notes


  • I followed the recipe exactly for this one. I wouldn't change a thing!
  • The toppings I used for my mini loaves were:
    • 2 plain (no topping)
    • 2 Ketchup (for the boys)
    • 2 Sweet & Spicy Mustard (from Epicure)
    • 2 Red Pepper Jelly (homemade by my mom)


That's it! Easy-peasy. I promise you, if you make this one (and you're a fan of meatloaf), you will not be disappointed!

Even my kiddos loved it!


Be sure to check back next time for some delicious Cherry Macaroon Cookies. My husband described his first bite as having 'fireworks' in his mouth. :)

*~Tara-Jane~*

Tuesday, July 23, 2013

Garden Quiche (Florence Fletcher)

Ok, so here I was thinking it had only been a few weeks since I last updated. Turns out I was way off...


That doesn't mean that I have stopped cooking though! As promised, I bring you grandma's quiche recipe today. This is by far one of my favourite recipes in this little box. One that I know very well and always looked forward to when she made it. Seriously, egg with pastry. Does it get much better?

One of my favourite things about quiche is it's really an "anytime" kind of meal. Winter, summer... Morning, evening. I've made it for Easter brunch, and I've made it for a casual Sunday night dinner. When in a pinch, make a quiche.

This recipe belongs to Florence Fletcher. Unfortunately, I don't have any pictures of Florence ("Flo"*), but I know they are around. My grandma had a wonderful album from her time working for the war effort some place in Quebec. I believe my brother still has the album, so I'll scan a photo and post it as an update soon. Until then, I thought I would share this absolutely wonderful photo of my grandpa helping my grandma up on to a tree stump. I adore this photo.


The Recipe Card:


The Process:

This is such a super easy and quick recipe to make. If you're using frozen prepared pie shells, it's even quicker. The majority of my time in the kitchen was spent making (and braiding) the pastry. In fact, it took so long to make the pastry that I worked up quite an appetite. My absolutely darling husband made me a gourmet snack of toast with butter, brown sugar and cinnamon. He should start his own blog, don't you think?!


I prepared my pie shells and placed the broccoli inside and then sprinkled with the (delicious) cheese.


You will notice that with the second pie crust, I did not braid the edge. I needed to save time and my sanity. I opted for a very classy fork-design-in-the-edge option, a la Stouffer's Chicken Pot Pie.

Whisk together the soup mix, basic, milk and eggs.


Pour over the broccoli/cheese and you're done like dinner. 


Pop it in the oven for 40-45 minutes and socialize with your brother, sister-in-law and adorable nephew while you wait. This last part is optional, but highly recommended.


Yum!


The Recipe:

Ingredients:
1 Knorr Leek soup mix
1 pkg frozen broccoli thawed & drained
1-1/2 cups grated Gruyere Cheese (see notes)
2 unbaked pie shells (coming soon!)
1/2 tsp dry Basil
4 medium Eggs
1-1/2 cups 2% Milk

Directions:
Over 375.
Arrange broccoli and cheese in pie shells.
Whisk soup mix and basil with eggs and milk.
Pour into shells.
Cook 40-45 minutes
Cool 10 minutes


My Personal Notes:

I remember one time I tried to make this for a small group of friends that I was having over. I was probably around 15 or so. Natalie, Ben, Nick and Marieka were coming to "hang out" and I thought it would be grand to show them how fabulous I was in the kitchen. When I got to the part in the recipe about adding the Knorr soup mix, I figured you actually had to prepare the soup as per the instructions on the package, and then add it to the recipe. Needless to say, we had a very sloppy quiche that night. I highly recommend not doing that!

  • I used fresh broccoli, not frozen/thawed/drained. I know, I'm such a traditionalist. 
  • If you're at all like me, you have no idea what Gruyere cheese is and why it's any different than cheddar (which I was going to get until I realized I have access to infinite information in the palm of my hands -or more accurately, the bottom of my purse- my iPhone!). I pulled over in the cheese and deli section of the grocery store and quickly googled Gruyere Cheese. It is in the swiss family and is named after the city Gruyere in Switzerland. It's also ridiculously expensive and tasty as all get-out. Mine looked like this and cost around $8-$9. It yielded almost the 1-1/2 cups. 
  • As it turns out, non-fancy crust tastes just as good as fancy crust. 

My husband has an aversion to quiche that I don't quite understand. Regardless, he suffered through and ate it all, saying "for quiche, it was OK". I've got to take what I can get ;)


Please give it a try!

Up next, I'm going to share the Pastry recipe I used for this. It surprised me some of the ingredients in it, but it was hands-down the best, flakiest pastry I've made.

*~Tara-Jane~*


*A little bit of "history"
My grandmother always used to address cards with the recipients name on the envelope, but the name was always in quotes. I would get a card addressed to "Tara-Jane", as if to say "if that is your real name". It was so endearing. These are the small things I remember about my grandmother - the things that will never be forgotten. My brother and I often sign our cards like this, just for fun because it makes us smile. 

I love you, "grandma". 

Saturday, June 22, 2013

Cauliflower Parmesan (Ro)

Happy Saturday, friends!

It's been a week since I shared a recipe with you - and this weekend there is going to be a lot going on in the kitchen, so I have to get caught up! It's raining here today, and we have some lovely friends coming over tonight so I want to make them a special treat. I'll share that with you later this week, but for now, I've got something REALLY yummy to share with you.


This recipe was amazing. I love cauliflower, but cauliflower with cheese and sauce? Yes, please.

This was Ro's recipe. Ro (Rosalie) was my grandpa's sister, and I got a bit more information about her from my aunt.
"Ro always seemed exotic. No kids, had a job, nice clothes, hair and nails, slim, with time to indulge in hobbies and crafts. She was an aficionado of the Kraft recipes, which were shown on commercials and all labels. Amazing gooey desserts with Kraft miniature marshmallows. She died in 1986."
Well, this recipe certainly falls under the 'gooey' category!

The Recipe Card:


The Process:

Step 1 is parboiling the cauliflower. Actually, back the train up, step 1 is learning what parboiling is... step 2 is parboiling. Set the cauliflower aside and start working on the rest of the deliciousness.


When I started this, I made a vow to use all the same ingredients as stated in the recipe - no substitutions unless absolutely necessary. Well, I broke that vow. I know mushrooms are great for you, and a lot of people love them. I loathe mushrooms. Honestly, even the site of them gives me the creeps. I just can't get over that they are fungus... and I'm expected to eat that? Not so much.

I did a quick search online for substitutes, and some people had mentioned zucchini as a great alternative. DONE!


I sauteed the zucchini with the chives and thanked my lucky stars that we are technologically advanced enough to be able to find *anything* on the internet. Because when you're mom's not home, who are you going to ask these sorts of questions?


Transfer with a slotted spoon to oven safe dish. Then with the butter that's left over in the pan, you make the cream sauce.


Mix it all together in the baking dish and top with a sprinkling of parmesan cheese.


Pop it in the oven and you're ready to go!


The Recipe:

Ingredients:
1 cup chopped Mushrooms
1/2 tsp chopped Onion or Chives
4 tbsp Butter
2 tbsp Flour
1 cup Milk
1/2 tsp Salt
1/4 tsp Pepper
1/4 cup chopped Parsley
1 large Cauliflower, parboiled in florets
1/2 cup parmesan cheese

Directions:
1. Saute mushrooms and onion in butter 5 minutes, then lift with slotted spoon to a buttered oven dish.
2. In a saucepan stir flour into butter over medium heat and when bubbly, stir in milk with a whisk. Season with salt, pepper and parsley.
3. Combine drained cauliflower with mushrooms in over dish, pour white sauce over top and sprinkle with cheese.
4. Bake 450 for 20 minutes. Serves 6.


My Personal Notes:

  • I used zucchini instead of mushrooms. Apparently zucchini has a very similar texture once cooked, so it was a good alternative in my mind! It was delicious and added some great colour.
  • When given the choice of onions or chives, I will always choose chives. They don't make you cry when you're cutting them, they smell delicious and they add great colour to the dish. 
  • Fresh parmesan is delicious. It made the perfect topping for this already amazing side. 


You should definitely try this out! Ro knew what she was doing with this one :)

Up next we're going back to the basics with one of the most easiest recipes in the history of time - but the perfection is all in the baking.... Shortbread!

*~Tara-Jane~*

Sunday, June 16, 2013

Ham & Broccoli Rollups

I'm really excited to share this recipe today; it was fun to make, it was delicious, and I know a little bit about where the recipe came from!


These Ham and Broccoli Rollups were amazing - Ham, swiss cheese, steamed broccoli and sauce (which I would say is comparable to a slightly less heart-attack-inducing Hollandaise sauce...)

A little history about this recipe; my mom worked with a woman named Chris Moxsmeth many, many years ago. She got this recipe from her. A few years back, after my mom had moved to another province, she was at a community school as part of a choir and met another "Moxsmeth". Turns out that this lady's husband and Chris' husband were related somehow.

What a small world!

Mom gave this recipe to grandma, so it is quite obviously the 'newcomer' to the red tin box.


The Recipe Card


The Process
All I can say about this is that I'm SO glad I had an extra set of hands! I was totally unprepared for the amount of 'stuff' was needed for this; ingredients, steps, kitchen space! I think the trick to this one is prep. Prep, prep, prep!

Here's how I went about it:

First, I sliced up the ham - I tried to get it as thin as possible, but had a hard time with that. Definitely the thinner the better on this one. The thinner it is, the easier it will be to get the toothpicks to hold it all together.


Then I steamed the broccoli and set it aside. These are going into the oven again to heat up, so you don't have to worry about keeping everything warm.  I sliced the cheese and set it aside as well.

The sauce was probably the most labour-intensive part (aside from the assembly, but I'll get to that!)

From my understanding, most cream sauces are made the same way; butter, flour... add the wet ingredients. While the butter was melting, I mixed the "add in" ingredients (PS I'm not the 'tidiest' cook...)


After the butter melted, I added in the flour and the mixture from above. Yum!


Then the milk.


It already looks amazing now, but just wait... you still have to add the egg yolks and reserved pineapple juice. Divine!

Then comes the fun part. I took a picture of all them at each step: slice of ham, cheese, broccoli, sauce, roll-up!

 
Off it goes into the oven - hurray!


The Recipe

Ham & Broccoli Roll-ups (make's 2 servings)

Rollups
4 slice Ham
2 slices Swiss Cheese
1 10oz pkg Broccoli
1 8oz can Pineapple

Sauce
1-1/2 tsp Flour
1-1/2 tsp Butter
1-1/2 tsp Horseradish
1 tsp Prepared Mustard
1/4 tsp grated Onion
1/4 tsp Worcestershire Sauce
1/8 tsp Salt
1/4 cup Milk
1 slightly beaten egg yolk

1. Cook broccoli (steam). Drain pineapple and reserve 1/2 cup juice.
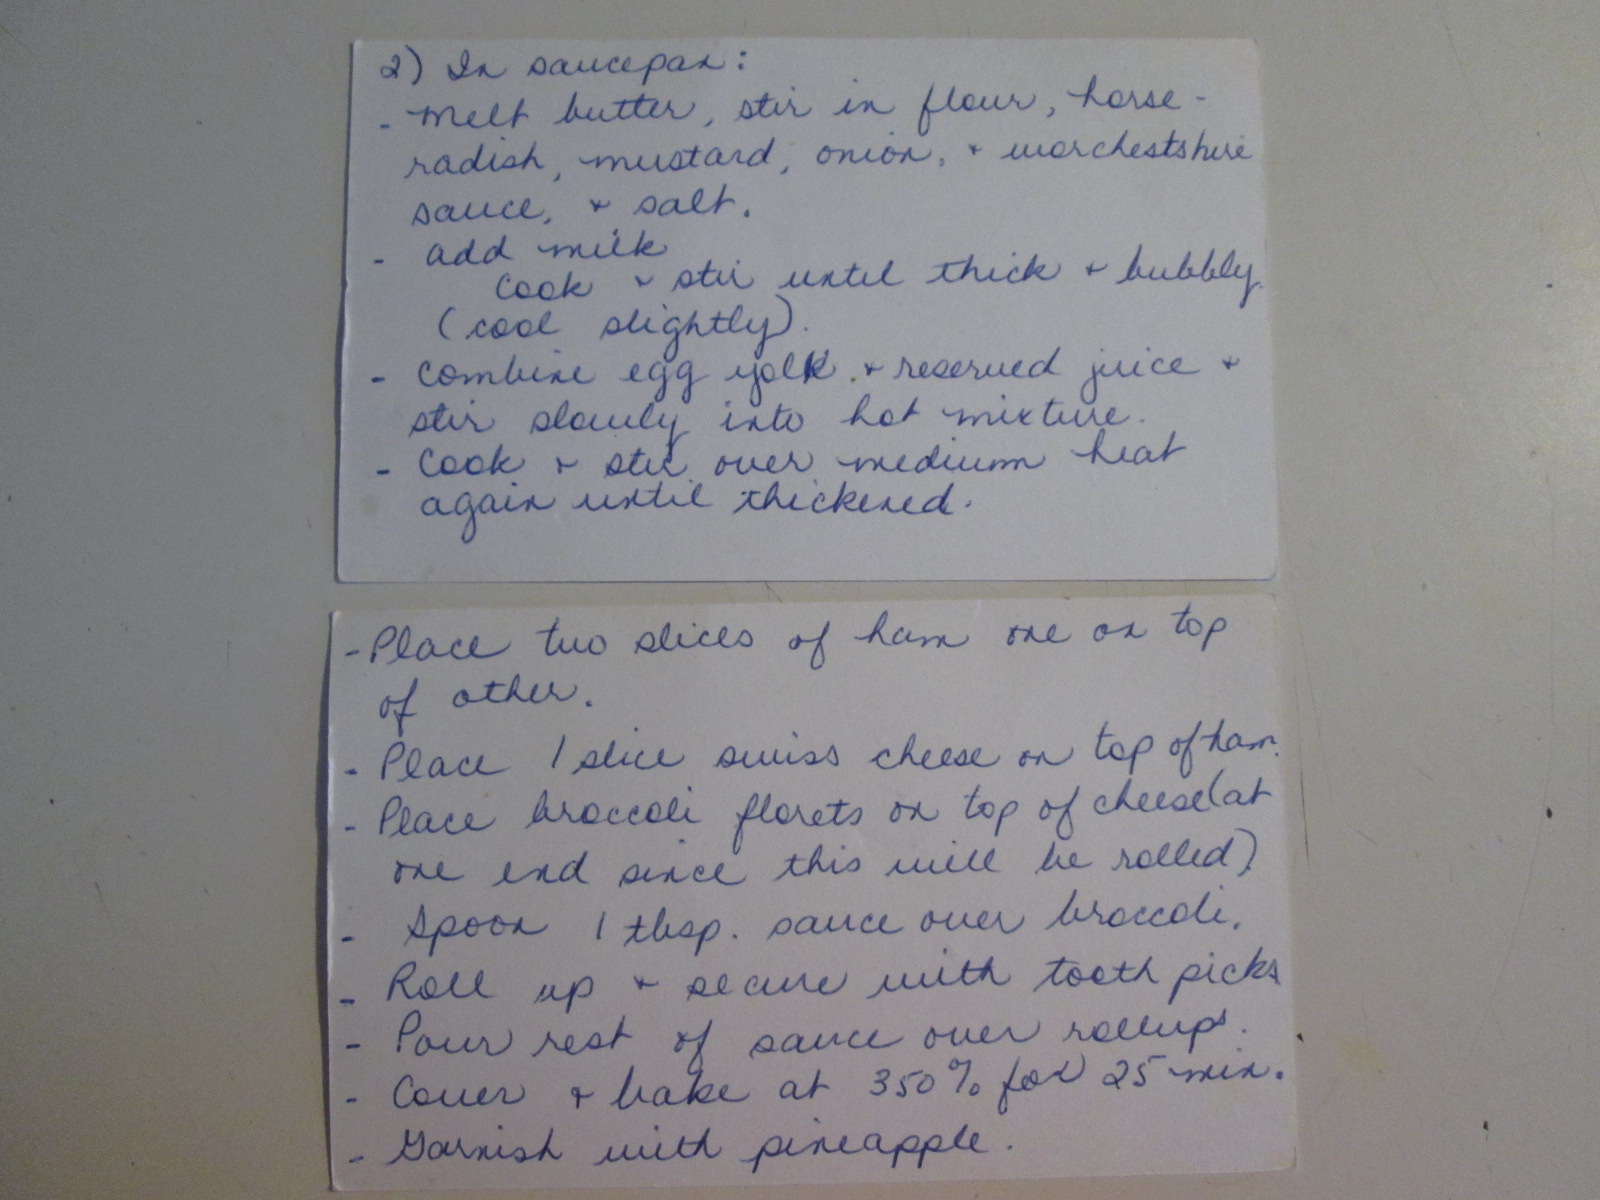
2. In saucepan, melt butter and stir in flour and horseradish, mustard, onion, worcestershire sauce and salt. Add milk. Cook and stir until thick and bubbly (let cool slightly). Combine egg yolk and reserved juices and stir slowly into hot mixture. Cook and stir over medium heat again until thickened. Cool slightly.
3. Place two slices of ham one on top of the other. Place 1 slice swiss cheese on top of ham. Place broccoli florets on top of the cheese (at one end since this will be rolled). Spoor 1 tbsp sauce over broccoli. Roll up and secure with toothpick. Poor rest of sauce over rollups.

Cover and bake at 350 for 25 minutes. Garnish with pineapple.

I forgot to pour the rest of the sauce over them before I cooked the ham.
I'm kinda glad I did! They got nice and browned (since I also had no foil to cover them with)


My Personal Notes

  • As I mentioned, the thinner the ham the better
  • I doubled the recipe as we had guests over, and I had plenty!
  • The recipe says to lay two layers of ham on top of each other and then add the insides - I did not do this. I used 1 piece of ham for each rollup. In hindsight though, it might be that two pieces were supposed to be overlapping only a little, so that the ham rolls up and around to make a complete cylinder. Know what I mean?
  • I totally forgot to garnish with pineapple, and I think that would have been the icing on the cake!
  • I omitted horseradish because I couldn't find any... :P
  • I used chives instead of grated onion. 
  • In step 2, it says to cool the sauce slightly after it is done. This is very important if you don't want the sauce oozing out. Since it's already thick, it doesn't pour all over the place, but if you let it cool slightly it because even thicker and stays in place. Makes the rolling part a little less messy.


All said and done, this was awesome. I don't remember grandma making this, but I'm sure she rocked it. She had a way of taking the most simple ingredients and making something magical with it. You know how food always tastes better when someone else prepares it? Maybe it was something like that - but let me tell you, she could make me a sandwich with veggies from their garden and it would be like the heaven's opened up and angels sung with every bite.

Her hugs were perfection, too.

Up next is Cauliflower Parmesan!

*~Tara-Jane~*


Tuesday, June 4, 2013

Savoury Supper

Savoury Supper - sounds delicious, doesn't it? It feels like every post I say "the best part of this experience is...", so why stop now! The best part of this experience is that I get to try new things. Things that I would have looked at and thought "Umm, no. Gross.", but because it is in grandma's special little red tin box, I'm all gung-ho.

Well folks, lesson learned.


Now, I don't want to be negative about this recipe right from the get-go, because in all honesty, it turned out OK, my husband had if for dinner and lunch the next day, and (shock of all shocks) both my children loved it.

However, I found myself saying "if I were to do this again, I would do this differently". Truth be told, it's likely not a do-over recipe - unless of course I'm trying to postpone the veal recipe for just one more day...

I'll get to the goods, and I'll explain as I go ;)

The Recipe Card:


The Process:

Place the "required number" of sausages in a baking dish and add sliced onion.

... and a cup (or less) or canned tomato soup. I went with the (or less). Season and put on to cook. Done!


Then we get to the part that kind of concerned me. You've got sausages, onions and tomato soup sitting in a baking dish, heating up in the oven. Then you're preparing what I can only imagine is some sort of pancake/cake batter. Kind of Quiche-ish, but not quite as egg-y (I'm sure both of those are words).

Alas, I followed through.


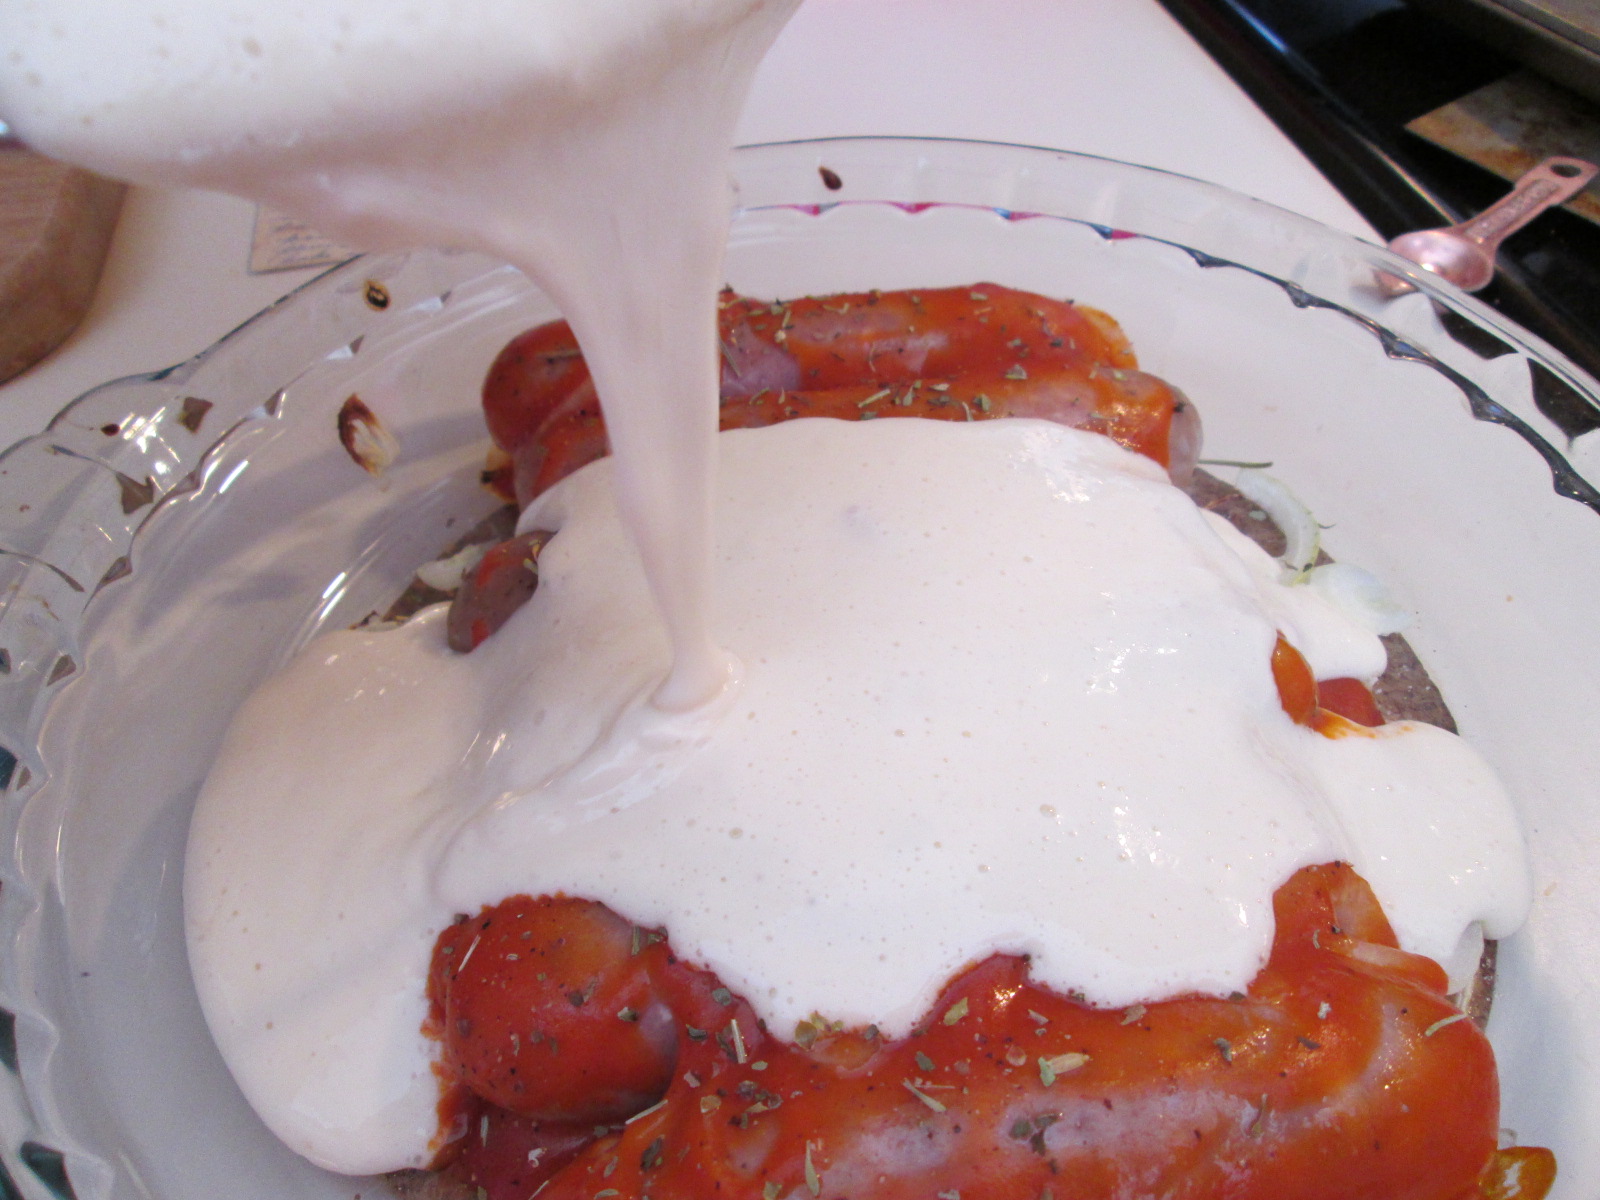
And then, when the batter is all ready, you whip out the partially cooked sausages and pour this on top. Yum.


Stick it back in the oven and wait.


Not going to lie - this smelled absolutely fabulous while it was baking. It really did smell 'savoury'. My spirits were lifted!

Out it comes:

We ended up serving it with some rice and a salad. Originally I had intended on having asparagus, but apparently asparagus doesn't keep as long as I thought it did.


The Recipe:

"Required number" Sausages
Sliced Onions
1 cup (or less) Tomato Soup

Directions
Place in baking dish the required number of sausaged, add sliced onions and a cup (or less) of canned tomato soup. Season and put on to cook while mixing the following

1 cup Flour
1/2 tsp salt
1 egg
1 tsp baking powder
1 cup Milk

Beat well and pour over the partially cooked sausages. Bake until browned nicely.

Again, no temperature, no time.


My Personal Notes:

  • When I eat sausages, I like them to be well done. And by well done, I really mean charred. "If I were to do this again, I would..." either cook the sausages ahead of time (BBQ, maybe?), or alternatively, I would cut them up into little medallions and line the bottom of the baking dish with them. By cooking them first, you run the risk of them still being pretty soggy because of the Tomato soup, but they wouldn't be so pale. It's psychological, really. By doing the medallions, the 'batter' would be evenly dispersed over the sausages and you'd get a more even distribution of sausage-to-batter in every bite - It's all about consistency, my friends.
  • I baked at 350 for about 30 minutes, and then because I was reducing the over to 325 for another recipe, I just kept it in until the oven decreased temperature and beeped. Not much more helpful than the original recipe, I know!
  • I seasoned with Italian Seasoning. They were Italian Sausages and I just couldn't think of anything better! Suggestions?!


Was this my favourite dinner ever? No. But it certainly wasn't the worst! Hunter did ask if we were going to have it again - so it's possible that I'll give it another go later on :)


Next up is Jam Layer Treat. I'm going back to the desserts!

*~Tara-Jane~*

P.S. I'd say about 95% of the time in this post, I wrote "sauges" instead of "sausages".